It is hard to believe that I haven't posted an update in two weeks only because the summer seems to be going so fast and this project has been moving at a snails pace. Almost all of last two weeks was spent simply waiting. I was waiting for my new mold to dry and waiting for the vibration table to be finished.
After my last post I began making a new smaller and better tray positive. As is often the case making it a second time was much faster, easier and the results were better than the first go around so while I was bummed to have to re-make, it in the end I am happier. Once I made the mold it needed time to dry which was just as well because it was taking a long time for the vibration table to get finished up. Robby completed construction about a week and a half ago but running the electrical from the motor through the vari-speed power switch required the UCA electricians which took a few days of scheduling etc. While I was getting anxious about the amount of time it was taking I was also aware of the fact that beggars can't be choosers...I can't weld with proficiency or do electrical work so I was relying on the skill and kindness of others. I spent about half of that time at home working in the studio on other projects/pieces. It hasn't felt efficient by any means and my ambitious goal of getting the trays finished by the end of summer isn't really within the realm of possibility but I still think I can accomplish getting the pieces done and the event organized within a year. We shall see. So below you will see the events of the past few days!
 |
| Here is the beautiful vibration table made by Robby Burton with the first mold strapped down to it! |
 |
| Here it is from a birds eye view all filled and drying. |
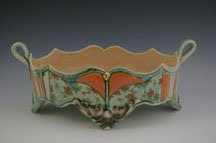
As of today I have cast the new mold twice. The good news is that the vibration table is doing its job and allowing me to cast the entire tray solid with no gaps or air bubbles. The bad news is that the tray is cracking in the mold. It is clearly from the slip shrinking around the mold as it dries in there. For those unfamiliar with the process, after you pour the slip the clay immediately begins to shrink as moisture is being absorbed from the object into the surrounding plaster mold. As the moisture is removed from the slip the cast object begins to shrink. If I can figure out a way to get the piece out of the mold before it shrinks too much it may not crack, but the mold won't open until it reaches a certain level of dryness so it is either a very fine balancing act to find the perfect timing or it will never work. Another option may be to use a different casting slip, one with more plasticity. We are using a new casting slip recipe in our UCA slip casting class this coming semester so it seemed reasonable to mix some up and try it in the mold. This would allow me to use the UCA slip mixer which holds 300 pounds of slip while classes are in session, in other words the students and I would be using the same slip (It is also allowing me and another student AJ Sawatzky to do some test runs on the studio recipe before we unleash it on the class in the fall). We are using Andy Martin's cone 6 casting slip which casts quickly and is super white. Part of what allows it to cast quickly is that it is less plastic, having larger clay particle sizes in the mix, I hope this is also what is causing it to crack so quickly in the mold.
 |
| Here is the first cast. The straight lines I cut to check thickness but the squiggly cracks all along the edges of the tray are from shrinking in the mold. |
 |
On a positive note the tray cast solid successfully and the piece looks relatively the same thickness throughout.
|
The first cast that you see above I left in the mold overnight, I figured this one would crack, but I had run out of time (I thought) before I had to be home to pick up the kids from school. When I opened it this morning it was all cracked into pieces so I cast the mold again this time planning on getting it out of the mold as quickly as possible. I started casting at 11am on the vibration table and refilled it every few minutes for 30 minutes until 11:30am. After that I let it sit upright on the table for an hour (not vibrating...it is loud...the table vibrates at 93 decibels...thank you AJ and your phone app), then removed it and laid it on its side on a regular table to dry (this is in hopes of casting more trays on the vibration table while the others dry in the future). An hour after that I was able to open the mold, much sooner than I had expected, the tray was still really soft AND still cracked.
 |
This is the second cast. The clay is still pretty wet, like I could roll this whole thing up and squish it back together wet and the cracks are still there.
|
 |
| Cracking detail-Yuck! |
I am very disappointed I fear that I may never get this to work while simultaneously thinking about how I might fix it in my next try! I am going to cast this mold one more time using the Andy Martin casting slip and see if I can un-mold it an hour after I cast it. If that doesn't work I am going to try using the casting slip I use at home which is very plastic (it is actually a throwing/hand-building clay body that I also use as a casting slip). Hopefully the more plastic slip will have a little more stretch in it and won't crack so quickly. We shall see. I am not ready to give up yet, surely there is a solution here, I just need to keep thinking it through and working until I find it. If there are any really seasoned slip casters out there reading this blog let me know if you think what I am trying to do is impossible OR if you have any great suggestions to offer please do!!! I am all ears and would love the help!!! For the rest you please just keep your fingers crossed for me!
Thanks for sharing your process! Do you know if the vibration table would work when slip casting hollow porcelain forms? I'm working on some translucent porcelain lights and am struggling with trapped air bubbles. Thanks!
ReplyDelete